Yay, you’re sitting at the table in the Gin Rummy Palace, the cards have been dealt, and a new round of Gin Rummy can begin!
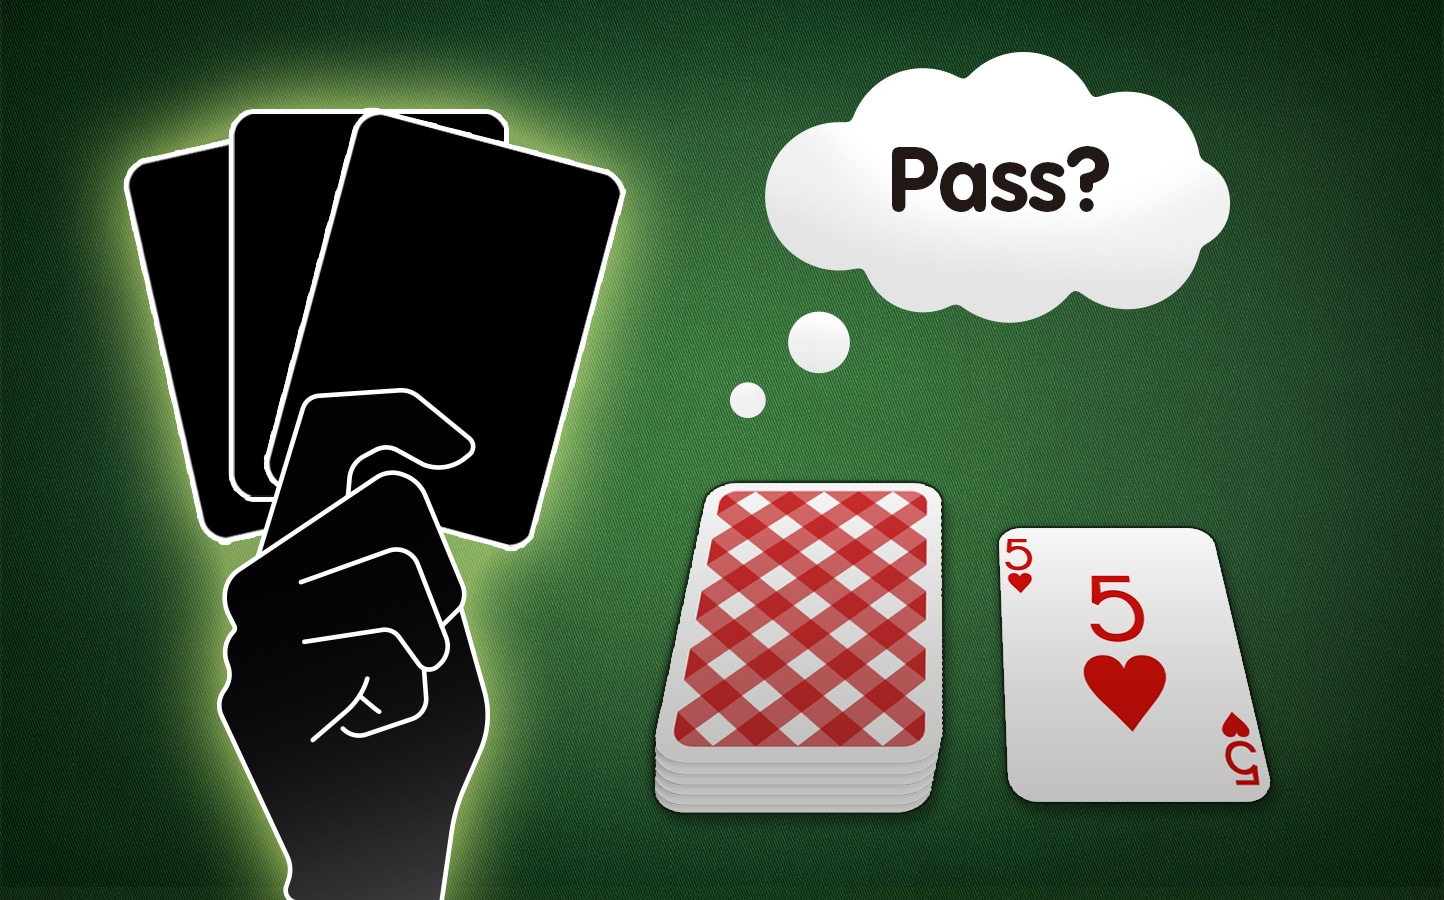
Now, you can choose whether to draw the first face-up card or pass. Which choice you make in what situation depends on several factors: the face-up card itself, your starting hand, and your aim or pursued strategy.
Prerequisites
To keep up with this lesson, you should already be familiar with the Gin Rummy Rules as well as the Gin Rummy Terms and perhaps have already studied the previous Gin Rummy Lessons.
The lessons on offensive Gin Rummy and defensive Gin Rummy are particularly worthwhile. In a nutshell, playing defensive Gin Rummy means giving your opponent the fewest possible opportunities to form or extend melds, whereas playing offensive Gin Rummy is characterized by forming melds as quickly as possible and playing for a gin without paying much attention to your opponent’s moves.
Of course, you cannot determine the outcome of the game solely by your decision at the start of the round. We, therefore, remind you once more that the longer the round, the more defensive moves you can make, even if you started offensively.
A Starting Hand for Offensive Gin Rummy
If your starting hand already grants you a complete meld, you may be able to get a Gin quickly with this hand. If you also have a triangle – i.e., a pair and an adjacent card to one of the pair cards – things are looking really good for you!
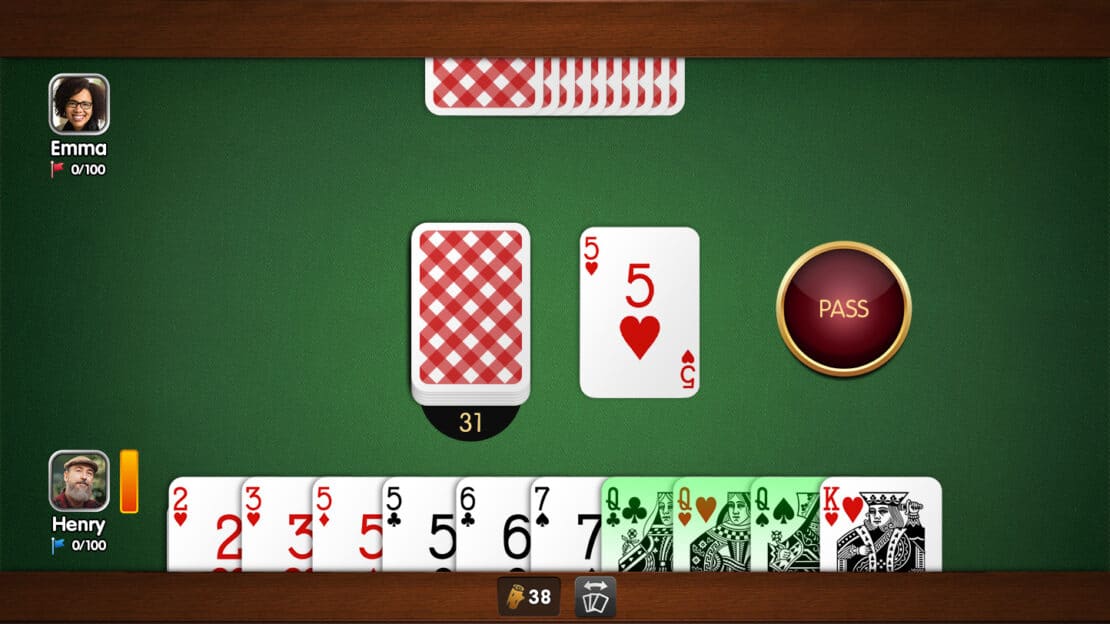
In this example, Henry starts directly with a group of Queens and the triangle made up of the Five of Diamonds, Five of Clubs, and Six of Clubs. The open card is even the Five of Hearts!
So, Henry picks up the Five of Hearts and forms a group of Fives. He keeps the Six of Clubs in case any cards appear to form a sequence of Clubs instead of a group of Fives.
The Two of Hearts, Three of Hearts, Seven of Spades, and King of Hearts are not directly usable. It makes sense to discard the heaviest burden on Henry’s deadwood, the King of Hearts, and throw down some offensive Gin Rummy in the next few turns!
Of course, this is a textbook example. You won’t get a clear hand like Henry’s here very often.
A Starting Hand for Defensive Gin Rummy
If your starting hand instead comes with multiple high-value cards that don’t fit anywhere, you need to be more careful. You have to replace several cards to be able to knock. To even get that opportunity, you should refrain from playing cards that are useful to your opponent.
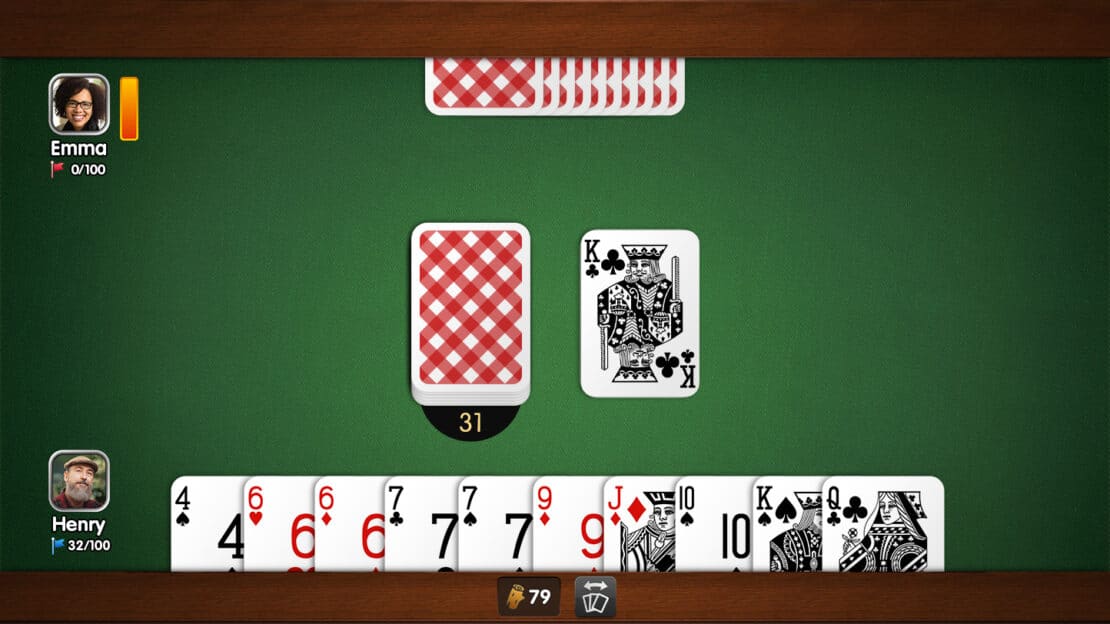
This time, Henry has four cards with a value of 10 as well as a Nine, none of which match. Here, it is important to either get rid of these unhelpful and expensive cards or transform them.
Let’s say Emma passes on the face-up King of Clubs and then discards the King of Hearts. Then, Henry can draw face-down on his turn and make the King of Spades his first and fairly risk-free discard to be rid of its deadwood points.
With a bit of luck, Henry will be able to join the Nine of Diamonds and the Jack of Diamonds in a sequence with the help of a Ten of Diamonds. But Henry shouldn’t wait too long for it.
If Emma discards several Tens or, say, the Nine of Spades and then the Jack of Spades on the following turn, Henry can get rid of his Ten of Spades. Emma may then still have the Ten of Diamonds and discard it, thinking that Henry doesn’t need any Tens.
When Emma discards a Six or Seven, Henry should strike immediately.
If Henry discards the Queen of Clubs and Emma draws it, even though she spurned the King of Clubs initially, either the Ten of Clubs and the Jack of Clubs have found their way into her hand in the meantime, or she is collecting Queens. So, if Henry draws a Queen later in the game, he should keep it to avoid giving Emma a fourth Queen for her group. Should Emma knock without a Gin later, the Queen from Henry’s hand can be added to Emma’s group of Queens.
If Emma later discards her Queens, Henry can also discard his to remove dangerous points from his deadwood.
The First Open Card in Gin Rummy
In addition to the prospects of your starting hand, the first open card is also part of the initial decisions in every round of Gin Rummy. Draw or pass? And what does your opponent do?
Case 1: Your Opponent Gets to Choose
We look at this scenario first, as you are mainly observing here and have fewer decisions to make.
Opponent Passes
Your opponent passing indicates cards that you can probably discard without much risk. Either your opponent has no interest in this card rank in general or in cards of the same suit in the immediate proximity of the discard.
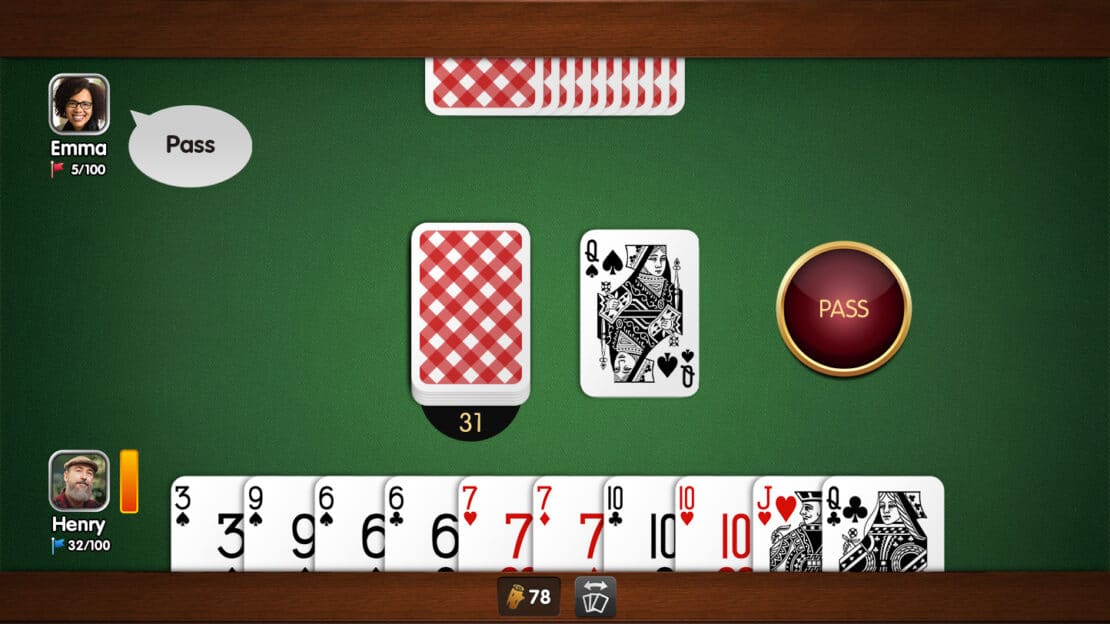
Should your opponent discard further cards during the round that point in one of these two directions, you can deduce whether you can discard your card, for example, of the same rank without risk.
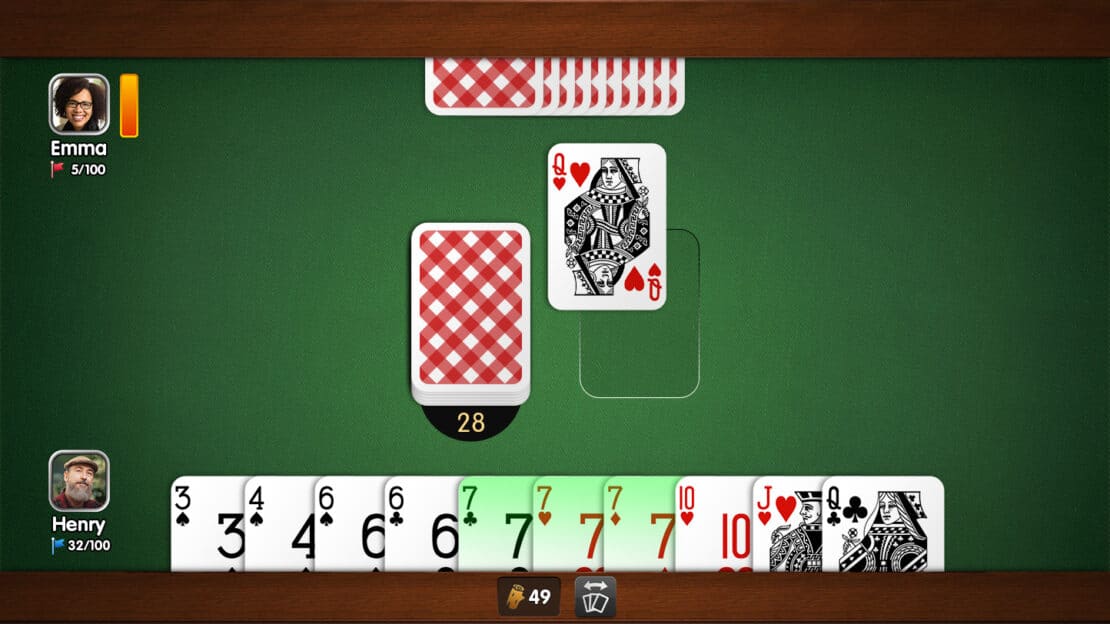
First of all, Henry should draw the Queen of Hearts to create a sequence of Hearts using the Queen, Jack, and Ten. Then, he needs to decide about his discard. Should he give up his Queen of Clubs?
Opponent Draws
If your opponent draws, the card will most likely contribute to a meld in their hand, especially if its rank is above three. If you have a choice, you should avoid discarding cards of the same rank or the same suit in adjacent ranks in your next few turns. Just in case your opponent has already completed a meld with this face-up card, it is a good idea to play a little more defensively.
Case 2: You Get to Choose
If you are first to decide on the open card, you have more to weigh up. Some cards always work, others never help, and there is plenty of leeway in between.
Definitely Draw
There are two types of cases where you can always draw. These two types may also overlap.
Low-Value Cards
There is no question if the first card is an Ace or a Two. Even if you can’t add it anywhere, a card worth one or two points will reduce your deadwood. For example, if you can get rid of a ten-value card in the same turn, you have shaved off eight or even nine deadwood points.
Key to a Meld
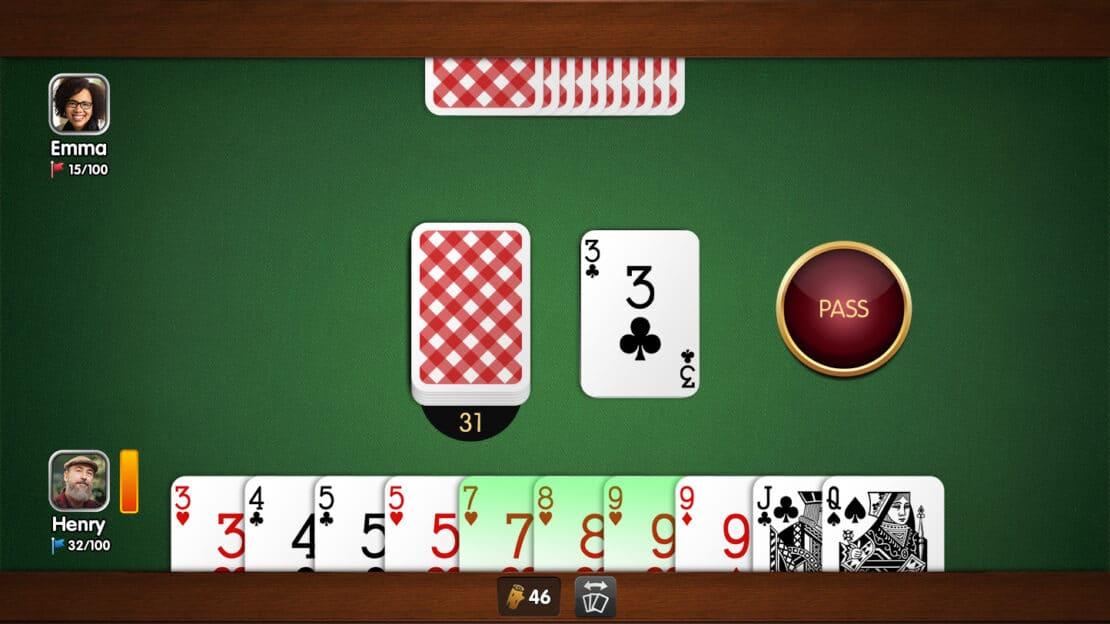
If you can add the face-up card to an existing meld in your hand or create a meld with its help, you shouldn’t hesitate to grab this card, either.
The following example is particularly nice for those who prefer a defensive style of play: If Henry takes the Three, Emma can’t be sure whether Henry wants to use it for a meld or just to reduce his deadwood.
Definitely Do Not Draw
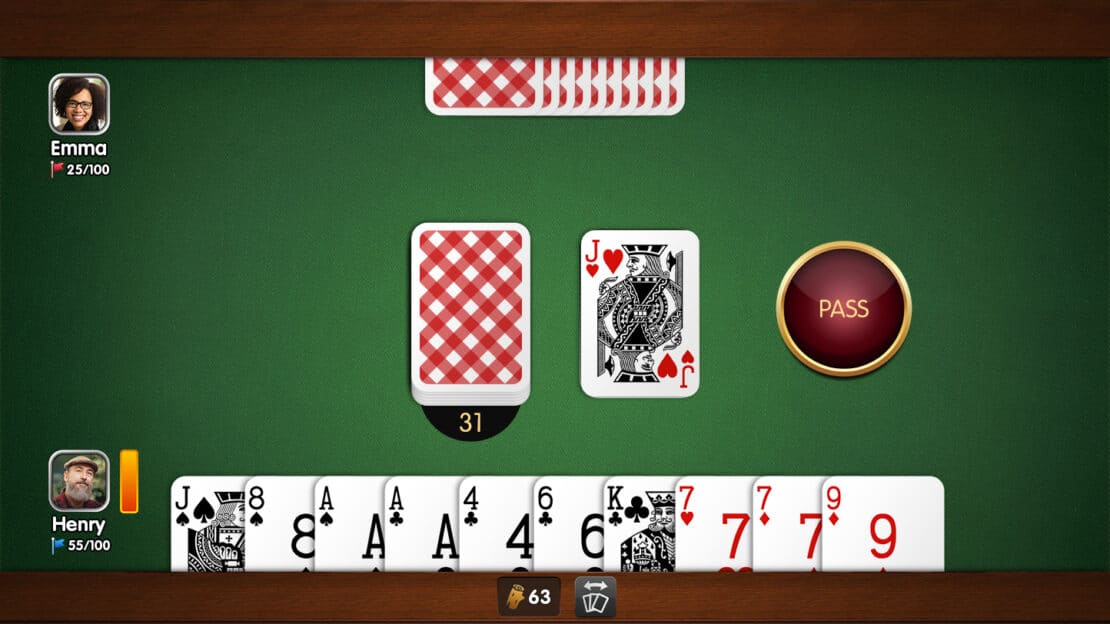
Under no circumstances should you bag the face-up card if there are no cards of the same rank or adjacent ranks of the same suit in your hand.
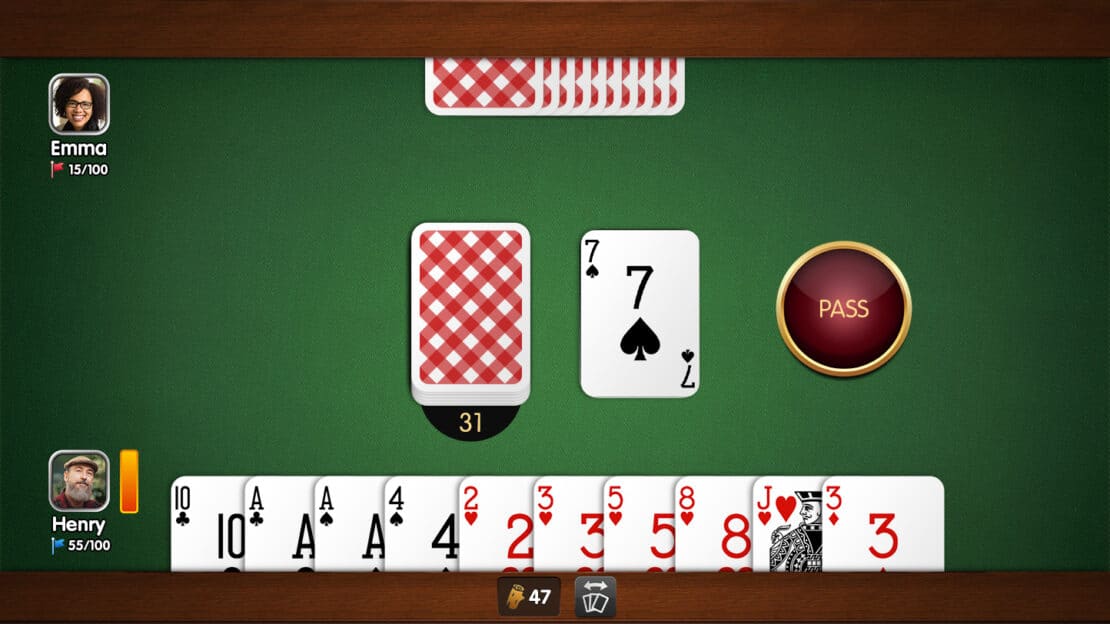
The higher the value of the face-up card, the stricter the criterion of matching hand cards. In the following example, while Henry has another Jack in his hand, drawing the second Jack wouldn’t produce a meld yet. In such a game situation, reducing deadwood is preferable over keeping it high with a Jack and its ten points.
When Drawing is a Matter of Consideration
As always, there is plenty of no man’s land in between the clear examples. There, you decide what you dare to do. Our lesson on card combinations in Gin Rummy is useful here.
Example 1
In this hand’s case, nothing really goes together right away. At least the pair of Queens and the Nine of Hearts with the Jack of Hearts hold out the prospect of a meld.
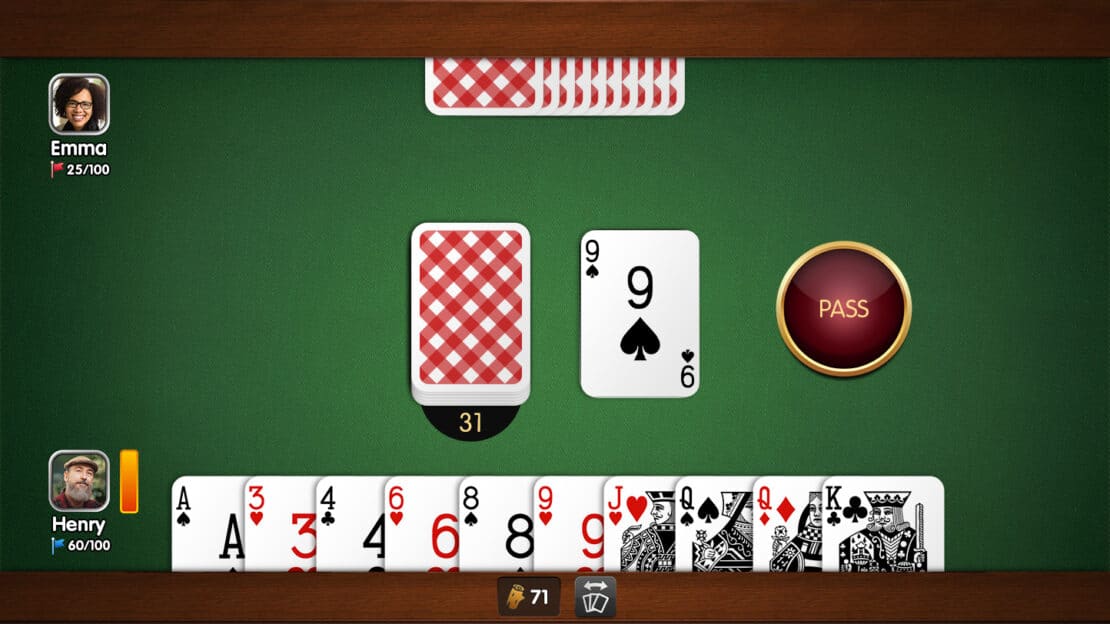
Now it’s up to Henry whether he draws face-down and hopes for one of the remaining two Queens or the Ten of Hearts.
Alternatively, he can take the Nine of Spades, creating a triangle of the Eight of Spades, Nine of Spades, and Nine of Hearts.
That adds four more cards to his options for success, which could lead to a meld in the next few turns. He would then have seven options, which isn’t bad at all:
- Seven of Spades (for the Spades sequence Seven-Eight-Nine)
- Ten of Spades (for the Spades sequence Eight-Nine-Ten)
- Nine of Diamonds (for the group of Nines)
- Nine of Clubs (for the group of Nines)
- Ten of Hearts (for the Hearts sequence Nine-Ten-Jack)
- Queen of Hearts (for the group of Queens)
- Queen of Clubs (for the group of Queens)
What would you decide in Henry’s place?
Example 2
There’s nothing on a silver platter for Henry here, either. However, he does have a chance of melding with the pair of Aces, the pair of Kings, the Queen of Spades with the Jack of Spades, and the Eight of Diamonds with the Ten of Diamonds.
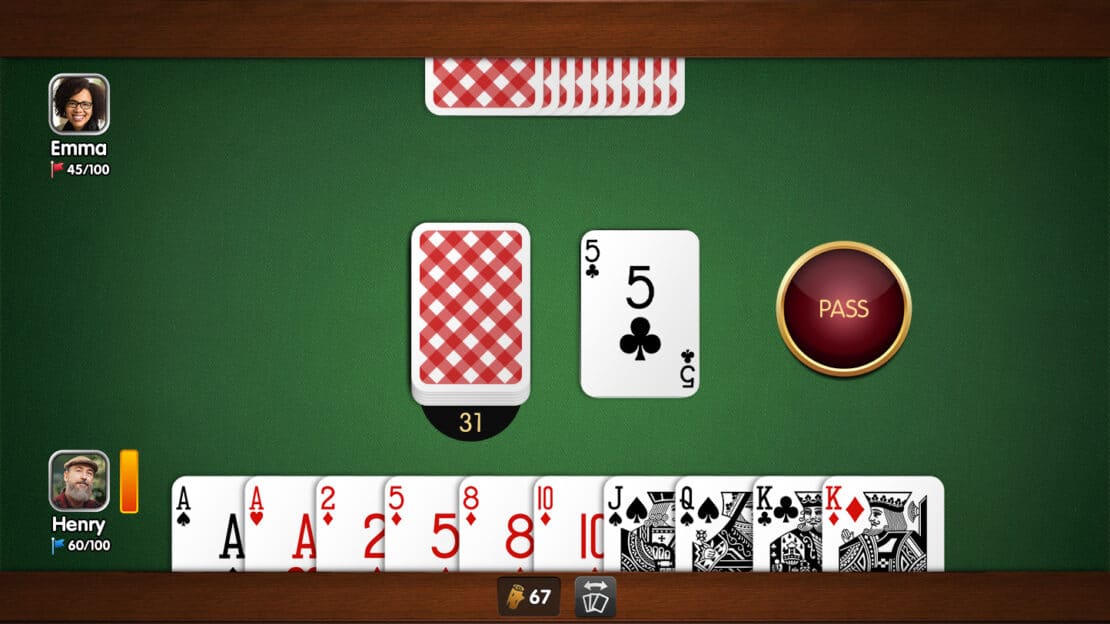
The open Five is neither dangerously high-value nor a great candidate for a knock cache.
Theoretically, it increases Henry’s chances of melds in subsequent turns, but it only adds one option to a single card: the Five of Diamonds and Five of Clubs could later form a group with another Five.
Yet drawing from the face-up pile would, of course, indicate to Emma that Henry can use either Clubs or Fives, and she would probably avoid discarding such cards.
If he draws from the face-down draw pile instead, he already has a number of chances to build a meld from the combinations mentioned above:
- Ten of Spades (for the Spades sequence Ten-Jack-Queen)
- King of Spades (for the Spades sequence Jack-Queen-King or the group of Kings)
- King of Hearts (for the group of Kings)
- Nine of Diamonds (for the Diamonds sequence Eight-Nine-Ten)
- Ace of Diamonds (for the group of Aces)
- Ace of Spades (for the group of Aces)
Therefore, it would be a good idea to see if he draws one of these six cards face-down instead of accepting the guaranteed no-meld case with just one more option.
One argument in favor of Henry drawing the Five of Clubs is that discarding a card with a value of 10 after drawing the Five could reduce his deadwood by five points. However, bear in mind that this would remove a few of the melding options just listed.
And that’s it for this lesson. Hopefully you’ve gained some inspiration for your next rounds at the Gin Rummy Palace.
You can continue browsing the Gin Rummy Lessons or the Gin Rummy Rules. Or you can put your new knowledge into practice right away in Gin Rummy online!
